

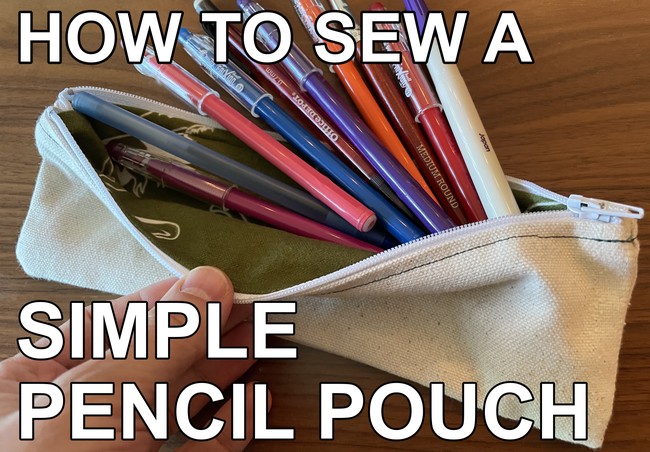
A quick and easy step-by-step introduction on how to sew a zippered pencil pouch.
The zipper sewing skill is a good skill to have in your sewing knowledge arsenal because there is a lot that you can do with them. You can sew pouches, purses, jackets and use them for craft activities like quiet books.
This is especially true for girl dads because having the ability to spin up clothes or accessories for your daughter is immensely useful and rewarding. Instilling the mindset that you can design and create your own fashion accessories with your kids I think is important for helping them develop creativity and an entrepreneurial spirit. You can help teach them to be the creators and designers of their own lives rather than passive consumers.
How to decide the length of the pouch
There are a couple different ways of preparing a zipper. One is to let the length of the zipper determine the length of the pouch. The fabric sews against the fabric sides of the zipper, the sides are sewn together and that covers the ends of the zipper. No muss. The other way is to clip the length of the zipper and installing your own ends.
This tutorial will cover making a simple, straightforward zipper pouch that can help build up your zipper sewing skills.
Level: Confident beginner
Materials for the project:
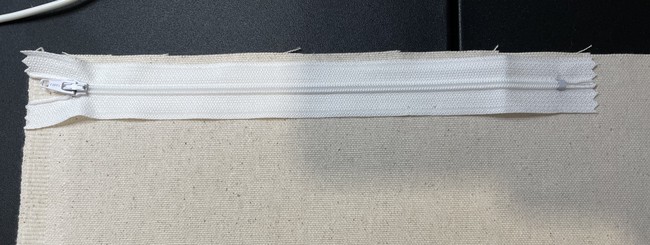
- Metal zipper or plastic zipper (the kind with a regular pull tab, not an invisible zipper since these are used for things like dresses where the zipper isn’t supposed to show)
- Outer fabric (recommended types: cotton, canvas). For this project I’m using a cotton canvas fabric that is the same on both sides. Using fabrics that are a solid color can make it easier if you’re worried about sewing the pieces facing the wrong direction.
- Lining fabric (fabrics: cotton, linen). This one I’m using leftover fabric from the drawstring bag tutorial.
- Needle and thread
Steps to Sew the Pencil Pouch
The pencil pouch pieces will consist of two outer pieces that will be on the outside and two pieces that will make up the lining.The zipper will be sandwiched between these two. Using canvas fabric will make the outside of the case more firm, but it’s up to you. You can experiment with different fabrics and sizes.
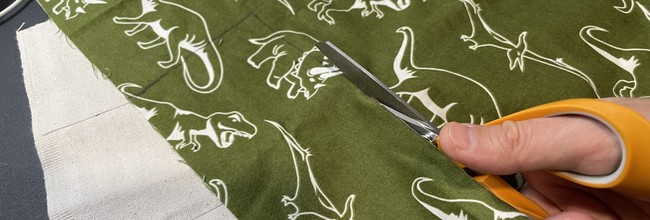
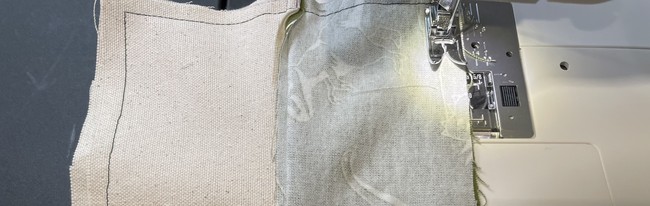
- Cut out your outside and lining shapes. Cut out two of each, so you will have 4 altogether. These will all be the same size. The size will be based on the length of the zipper This one is 9” wide x 4” tall.
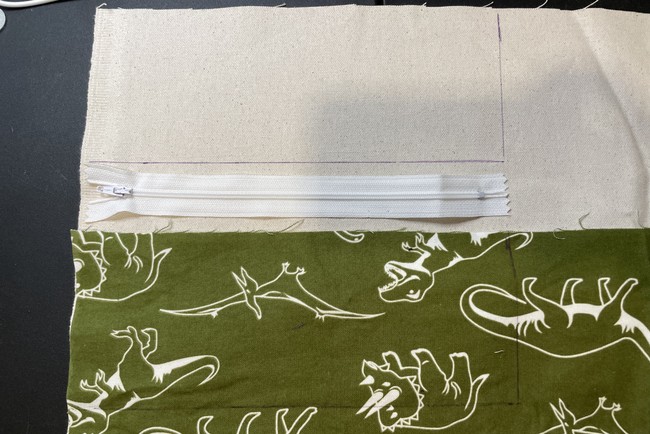

2. Place the zipper on the top raw edge of one piece of the lining fabric. The zipper teeth are pointing up. In terms of sewing needle, for thicker fabrics like canvas, I prefer a jeans needle so it gets through fabric more easily.
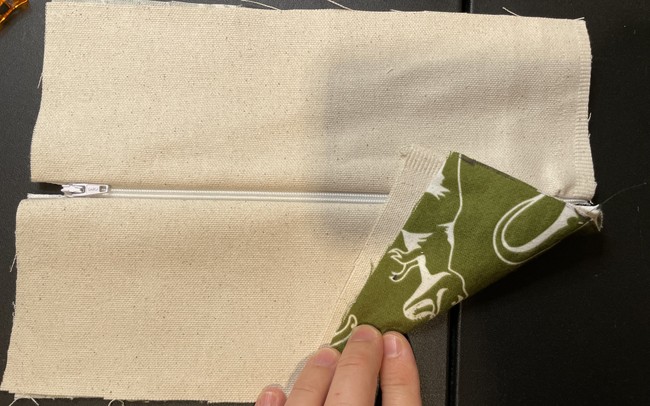
3. Place one piece of the outer fabric on top of the zipper with right side facing down. The zipper will be sandwiched between the two pieces, teeth side facing up, and the lining printed side facing down.
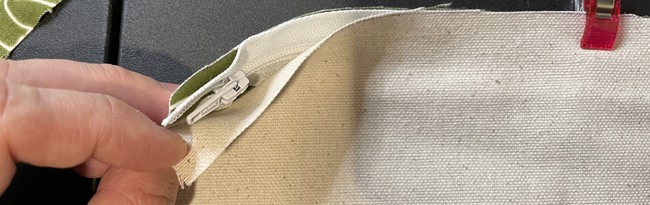
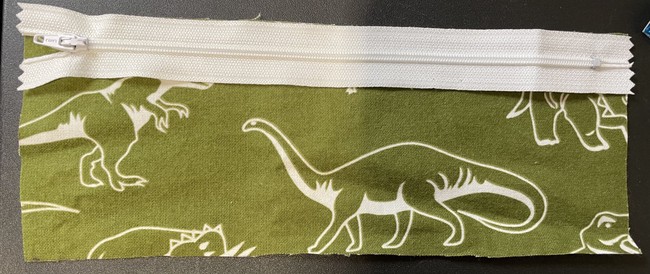
4. Using your zipper foot sew the top half of the zipper to the two fabric pieces. You can feel the lump of the zipper under the fabric and line up the foot toe along this edge as a guide when you see. The zipper lump will be on the left side of the zipper foot.
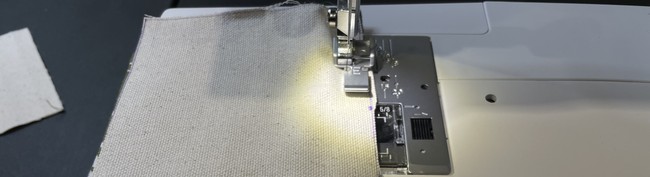
What is a zipper foot?
Part of the default feet that come with your sewing machine will likely be a zipper foot. This one looks different from your other sewing feet because it does not have the gap in the middle but instead has the one elongated shape that looks like a paddle. This is so that you can put the feet down and sew as close to the zipper as possible. This may seem intimidating, but is actually really easy once you get the hang of it.
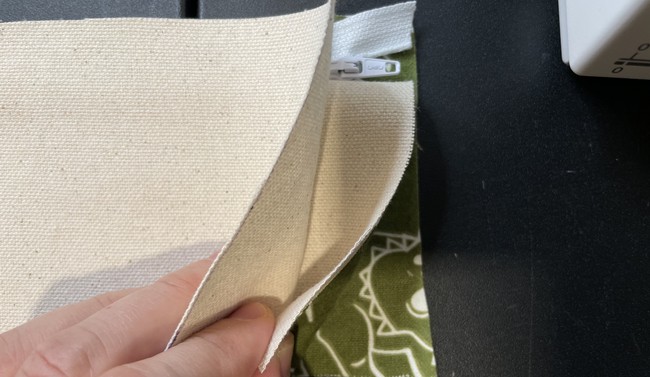
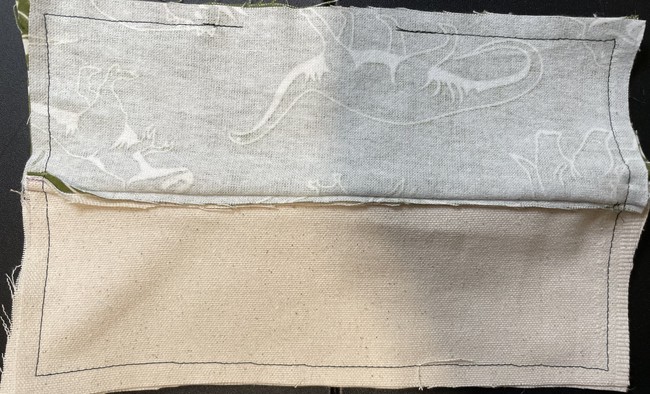
5. Fold each of the fabric pieces back with the outer piece on top of the lining piece.

6. Do the same with the other side. Bottom: lining piece right side up, zipper (with teeth facing up), top: outer fabric (right side down). You will tuck the panels from step 4 in between these layers. The top raw edges of the outer fabric and lining fabric are aligned with the raw edge of the zipper that is not sewn.

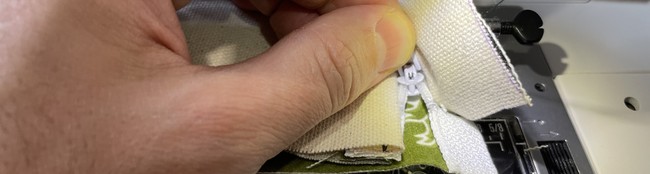
7. Pull the zipper down a little bit. This is so that you can start the stitch in step 7.
9. Fold down the two sides so that the outside and inside of each piece for each side are facing together.
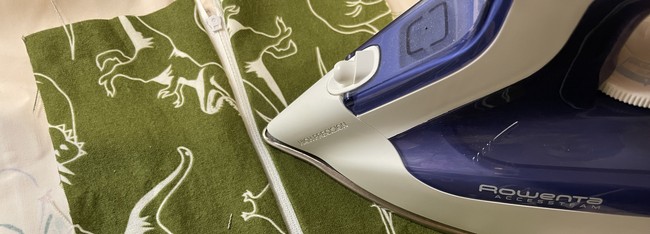
10. Iron down sew these edges are nice and crisp.
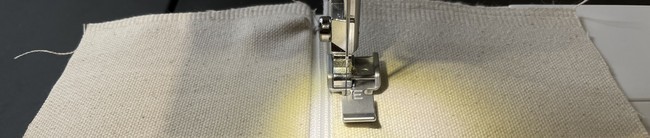
8. After that, top stitch along the two edges of the zipper. After you’ve sewn to the zipper pull tab, pull the tab back up and keep sewing. You’ve now sewn the outer piece and lining piece together along the zipper (but not anywhere else).

9. Pull the zipper down halfway. This is so that you can turn the pouch right side out at the end.

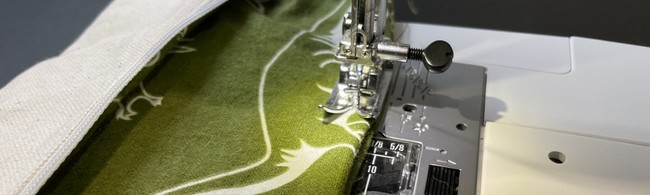
10. Now, once the top stitch is done, place the outer pieces together on one side of the zipper and the lining pieces together on the other side.
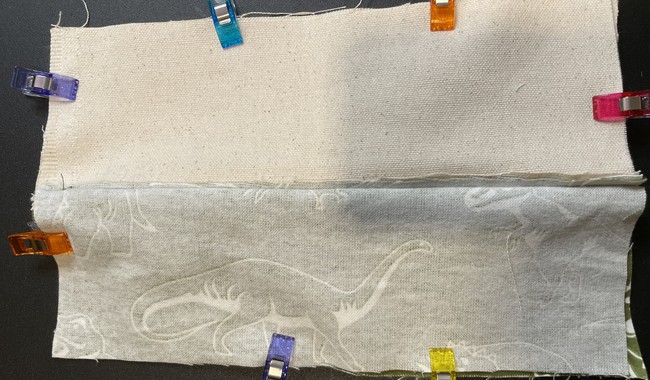
Line up the corners and pin or clip together. You can baste the sides in place here if you don’t want them to move, or you can just wing it. The right sides/patterned side of the fabric should be facing in (the wrong sides should be facing out).
11. Sew around all sides with a 1/4” seam allowance. Leave about a 2” gap on the lining side to turn right side out.
12. Turn the sewn pencil pouch right side out. Poke out the corners using your tool of choice like a chopstick or pencil. Pull the lining out and away from the outside.


13. Stitch up the gap from step 10. The lining will be on the inside of the pouch so you can just do a machine stitch here instead of doing a hand stitch.
14. Stuff the lining inside the pouch.
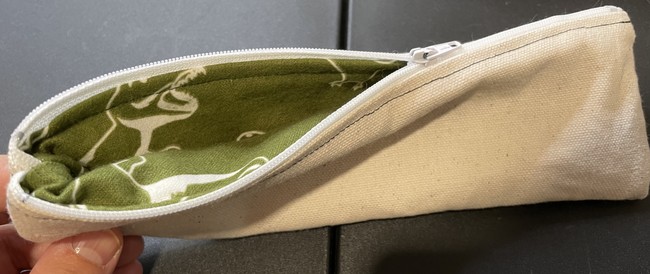
At this point you should be seeing the patterned side of the lining. But if it’s facing the other direction that’s fine too. It’s a lining after all. Its your project. If you mess up it’s okay. That’s the lesson we would want to teach our kids if they were learning to make the same project.
You can sew the lining to the outside panel here if you’re worried about the lining sliding around.
What to make next
15. And that’s it. Imagine all the variations you can make now with different zipper pouches: pencil pouch, makeup pouch, coin purse, bag for screwdrivers and tools, on and on.
Leave a Reply