

There’s a special kind of relationship between a man and his sweatpants. This makes parting with them especially hard when the waist and legs wear out.
I, like most dads, have this ancient pair of sweatpants that I pull out when the weather starts to cool off. I’ve had these sweatpants for forever. I got them at Target for a reasonable price and, despite my wife’s consternation, they’re an indispensable part of my wardrobe. In the words of Garth Algar from the film Wayne’s World: “At first it’s constrictive. But after a while it becomes a part of you.”
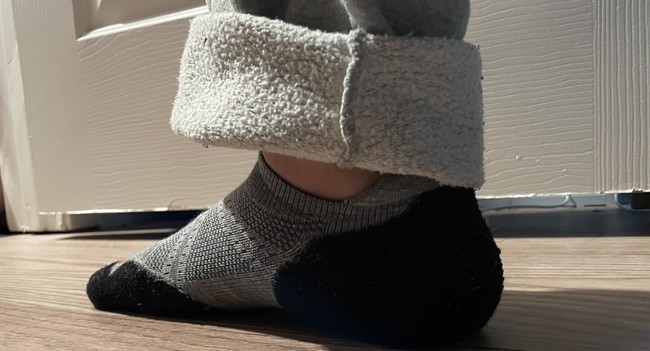
The only problem is that they’re so worn that the elastic on the legs has become exhausted to the point of no longer being stretchy. This results in an experience as shown where I have to roll up the pant legs to not trip over them. Then they end up getting unrolled, then rolled back up again, and it’s a terrible experience all around.
But thankfully I have the benefit of knowing how to sew and I can bring these sweat pants back from the discard pile using my know-how and a few simple steps.
This post I’m going to go over a simple process for revitalizing the legs, and optionally waistband, of that old pair of sweatpants of yours.
Level: Beginner
Materials:
- One or more pairs of old sweatpants
- 1/4” or 3/8” elastic for the feet
- 1/2” elastic for the waist
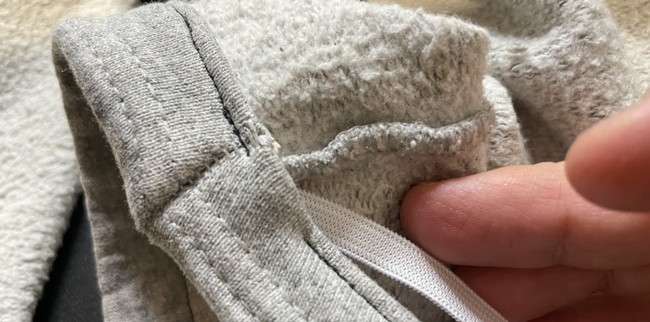
For the repair of the leg cuffs you will essentially be making a new casing for the holes, threading the elastic through the casing and sewing it down.

So take your elastic and/or measuring tape and guide it around the outside of the leg hole and gauge the circumference of the hole. This will be your base length for the elastic. Mark this length of elastic. You will end up shortening this by about 2-3” depending on how tight you like the fit. Cut two pieces of this length.
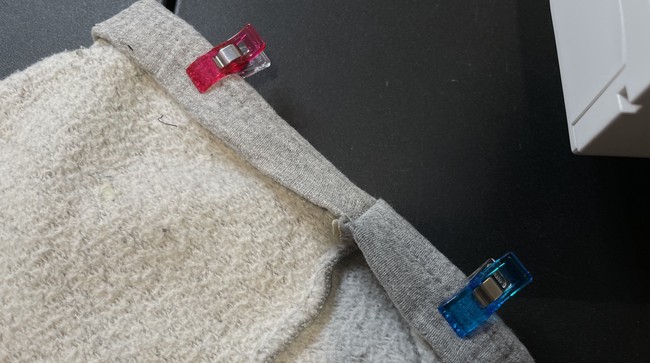
2. Flip your sweatpants inside out. Then fold the edges in (wrong sides facing) about 3/8” if you are using 1/4” elastic (1/2” in if you are using 3/8” elastic). In sewing parlance this is called a ‘casing’.
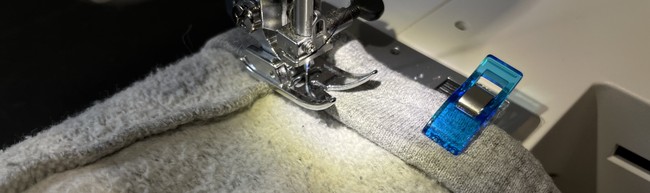
3. Sew with a straight stitch about 1/8” from the edge.
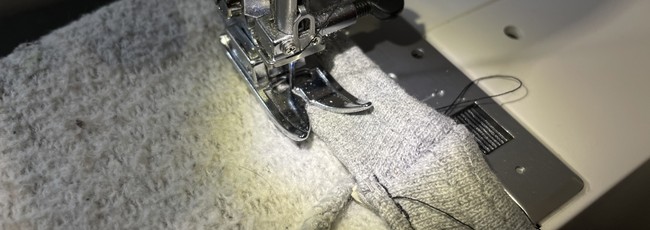
Leave a small gap at the end to use to feed the elastic through.
In this case a fresh universal needle and all purpose thread should be all you need.
4. Feed your previously cut piece of elastic through the casing.
Some posts will recommend clipping a safety pin to the end and feeding it through this way. But I honestly don’t think this makes it any easier. I prefer to use a specialized tool for feeding through a casing. It saves a lot of time and is a good investment if you find yourself doing this a lot.
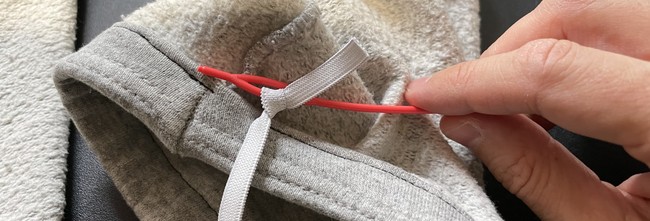
5. Once it’s reached the other end pull it out through the hole.

You should have two ends coming through the hole. Cinch the elastic up around the ankle by pulling on both ends of the elastic. Pinch together, mark the spot and clip/pin both sides together. The tightness that looks comfortable (not too constricting).
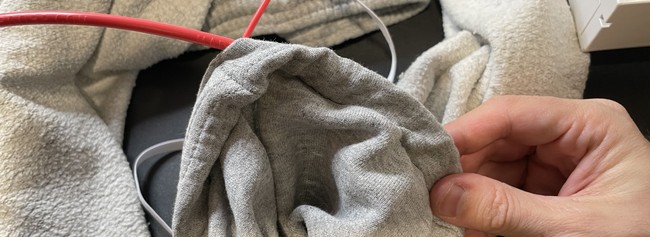
6. Overlap the elastic and stitch together with a zig zag stitch at the spot you just marked.

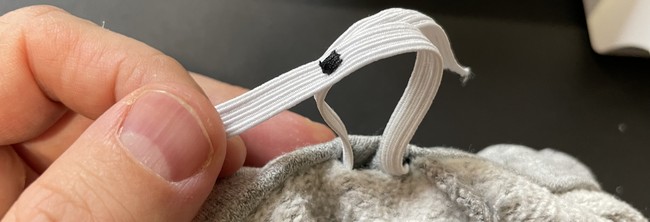
You can adjust the tightness of the elastic before you sew it together to see what level of ankle tightness works best for you. Try it out before sewing the elastic into the ankle.
7. Cut off any excess and feed the elastic all the way into the casing.
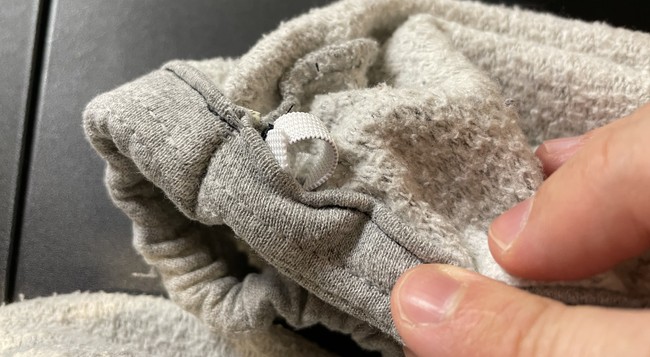
You should see the pant leg start to get that around-the-ankle stretchiness back.
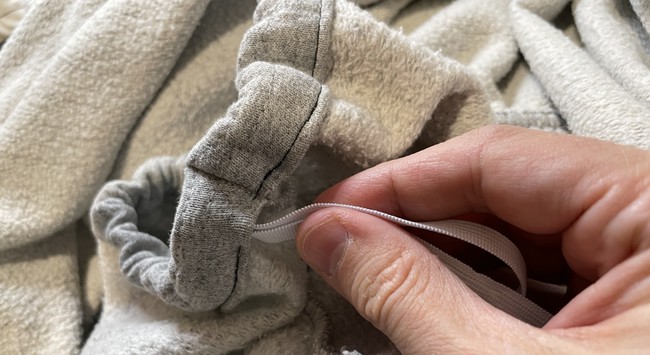
8. Stitch the hole closed while also stitching the elastic in place to the pants.

Repeat this process for the other pant leg. You will also do the same process for the waist if you want to revitalize the waist.
What to make next
And that’s it! Turn the pants back right side out and wear them for another 10 years.


Leave a Reply