

Canvas totes are another practical project you can use to build up your sewing muscles. There’s a lot of variety you can do with fabrics and textures. If you’re making the bags for your kids you can also practice adding appliqué patterns and designs, embroidery or do a project with your kids where they decorate it with markers.
Sewing canvas bags from scrap materials like old clothes or linens is also a good way to teach your kids about environmental stewardship and up-cycling. Instead of throwing them out, make a bag with them to take to the grocery store. If it’s something with sentimental value, like that baggy old shirt your wife is making you throw out, make it into a handy tote so that you’ll never have to part with it again.
Level: Beginner
On the surface this may seem like more than a beginner sewing project, but it is really just sewing two pieces of fabric together. If you can do that, multiple times, and sew those together then you can do it too.
Supplies:
- 1/2 yard cotton canvas
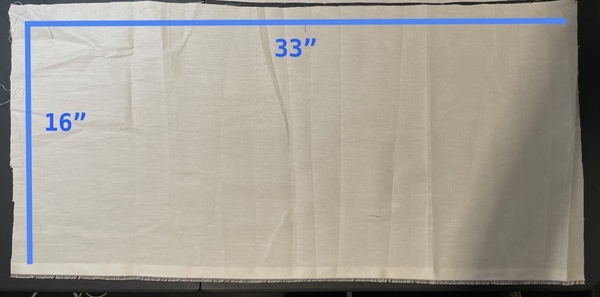
- Cut one rectangle: 16 x 33”
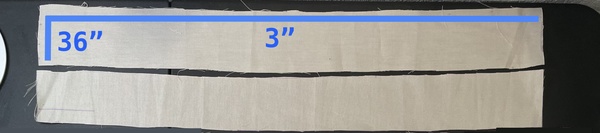
- Cut two strips: 3 x 36”
- Thread
- Sewing machine
- Scissors
- Seam gauge
- Iron
Steps:
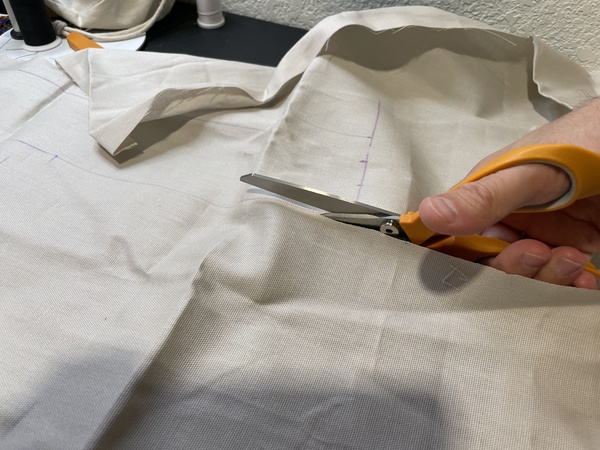
- Measure and cut out the first large block. This will be the body of the canvas bag.
After cutting it, fold it in half and iron the fold. This will be your guide for sewing the handle.

2. Cut out the two long strips. These will be your handles. Fold the strips in half lengthwise and iron.
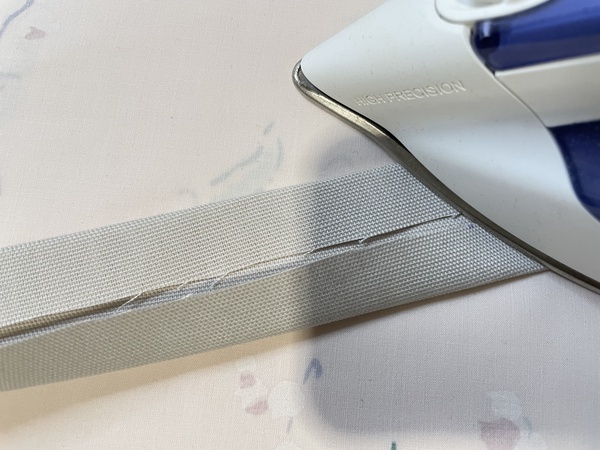
Then fold in half and iron. Here you are making a hem, so once you sew there will be no exposed raw edges.
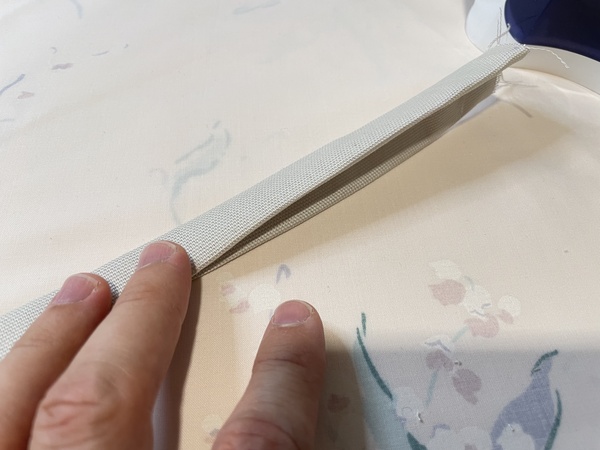
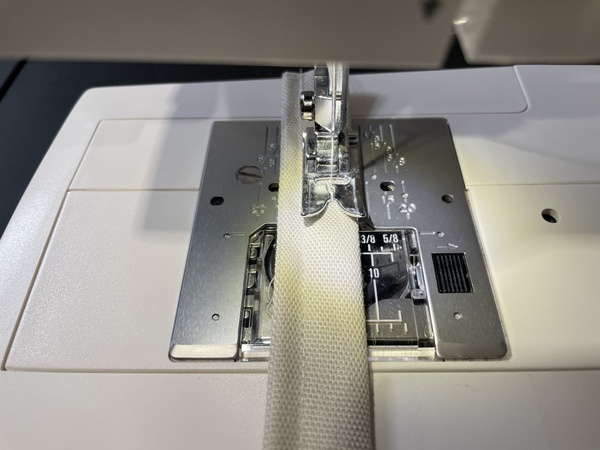
3. Sew the straps together by stitching down the open side with about an 1/4” seam allowance. Then sew a straight stitch down the other side, the same 1/4” from the edge. The other side is more for visual consistency.
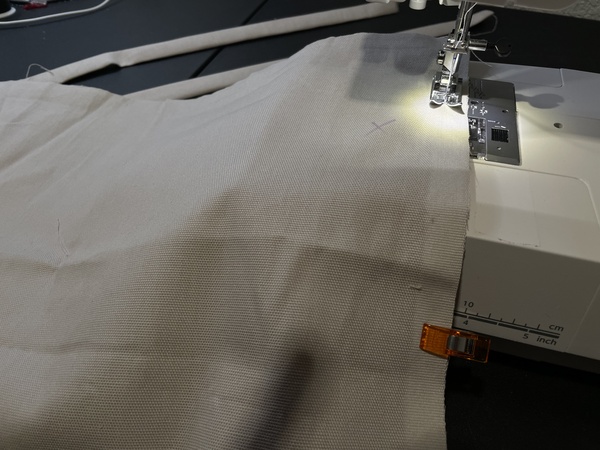
4. Fold the bag in half with right sides facing (RSF). The bag is still inside out at this point. Then sew up the sides with a 1/2” seam allowance. I am marking the bag with an X here to indicate which is the right side and which is the wrong side (of course if it’s a single color then it doesn’t really matter, which can actually be easier when starting out).
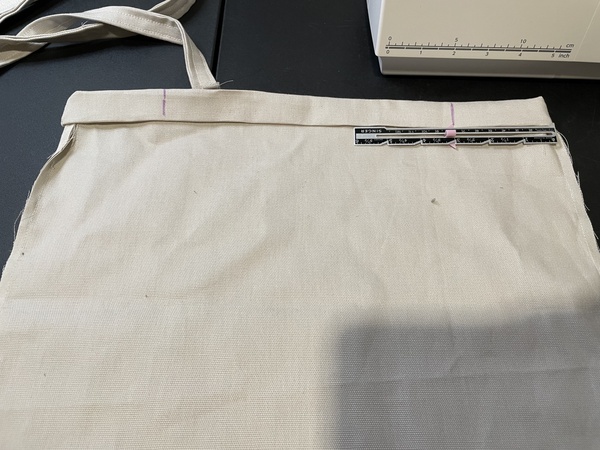
5. Fold the top of the bag down 1” with wrong sides facing. Then fold down again another 1”. Iron down and crease. Again, you’re doing the double fold toward the inside of the bag so that the edges will be smooth.
Apologies for the poor contrast. The iron is sewing the edge of the fold here.

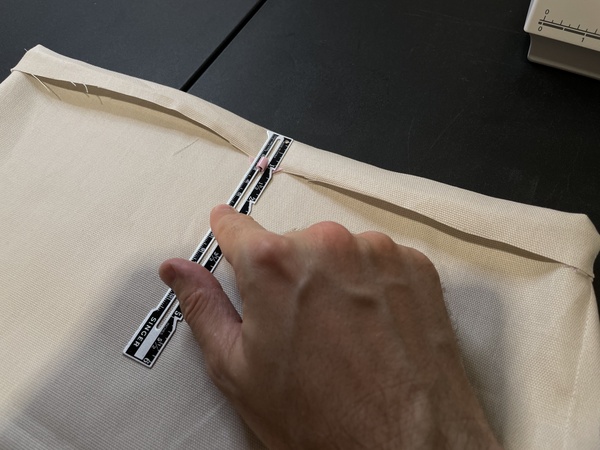
6. With wrong sides still out, measure 3” in from each side and mark at the top. Do this on the front and back.
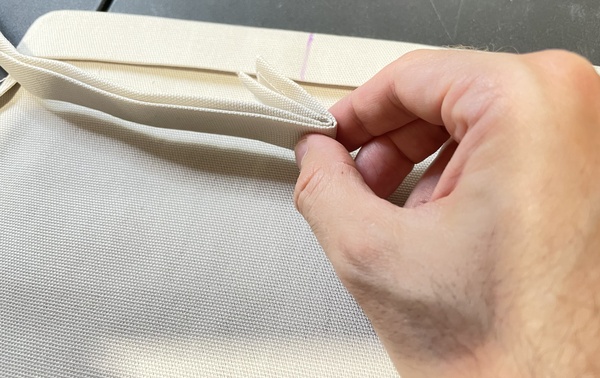
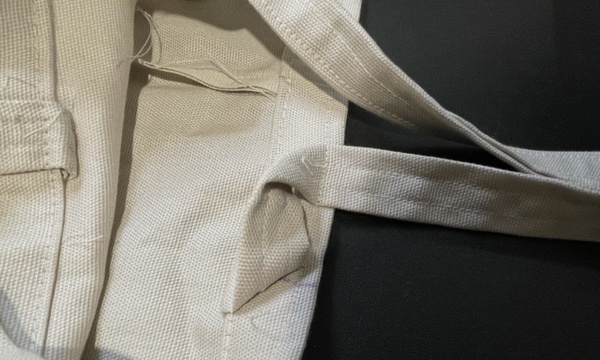
7. Take your strap strips, fold one end down about 1” and tuck it under the hem you just rolled at the 3 inch marks you just made.
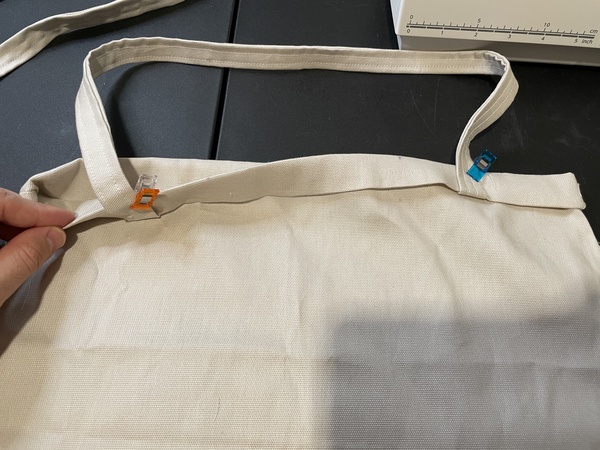
8. Pin or clip the strips down and baste them in place with the ends tucked under the frame. Each end of the strap strip should be on the same side of the main bag.
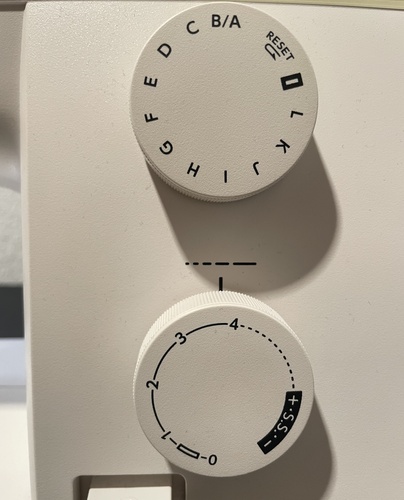
A basting stitch is a stitch used to hold fabric in place while you position it temporarily. To do a basting stitch set your stitch length to the longest setting. Then stitch where you want to hold in place. Do not do a back stitch here. After you do your actual stitch, pull this placeholder thread out.
The basting step is also a good place to try out the straps of the bag, check the placement of them and adjust before you sew the whole thing down.
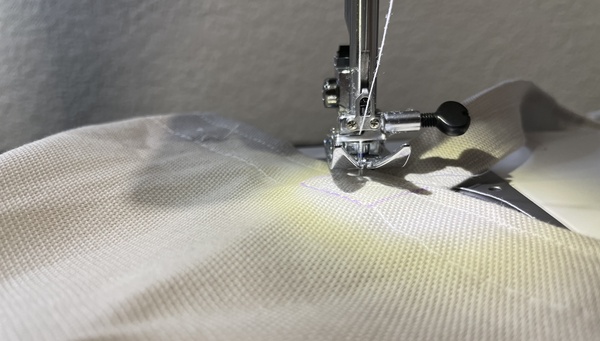
9. Next you are going to sew the straps and the hem in place. Start at the side seam and stitch the hem down all the way around the top of the bag about 1/4” away from the lower edge of the hem.
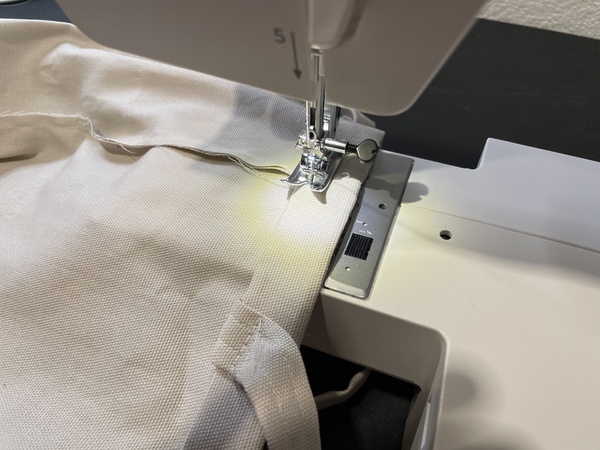
You will be sealing the handles down under the hem with this stitch. Don’t try to pull the fabric along here. Let the feed dogs do the work.
It’s worth noting too that you don’t need to get caught up in the seam length and lining everything up. Unless you’re planning on selling these on Etsy then this is your project . It doesn’t have to be perfect, and that’s the point.
10. Remove the basting stitches.
11. Turn the bag right side out.
12. Then starting at the side seam top stitch around the top of the bag about 1/8-1/4” down from the top. Starting at the side makes the back stitch less visible.

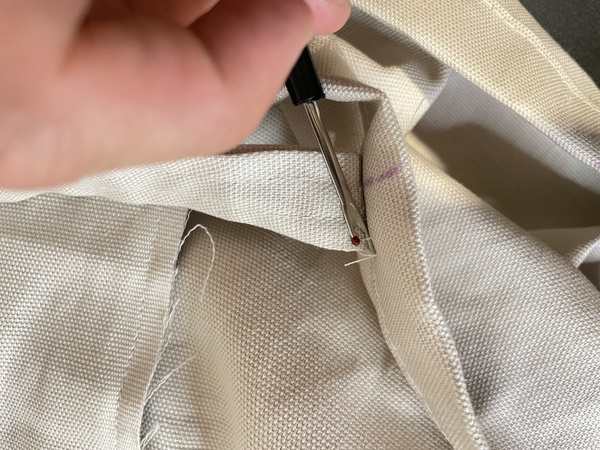
Make sure you keep track of where the straps are so you see them down at the right spot and don’t sew them down at a weird angle. If you do, don’t worry. That’s what seam rippers are for.
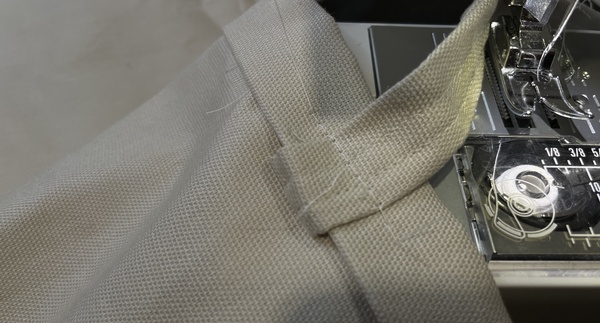
13. Box stitch the part of the straps at the top of the bag to make it more secure. A box stitch is pretty self explanatory but to do it stitch a rectangle around the strap, then when you’ve completed the rectangle stitch diagonally across to the other corner, stitch back up then diagonally back across.

When you pivot at each corner, keep the needle down in the fabric, lift up the presser foot, and rotate the fabric around the needle.
Again, don’t forget to lock your stitch at the beginning and end (also known as back stitching or back tacking.) Draw a box around the straps if it helps and sew right inside the lines.
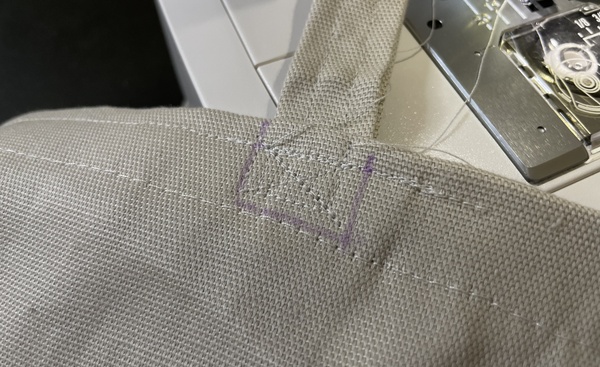
Also be mindful of where the other side of the bag is and be careful not to sew through to the other side of the bag. It can help to manually crank the foot with the wheel here to get more precision at the pivot points.
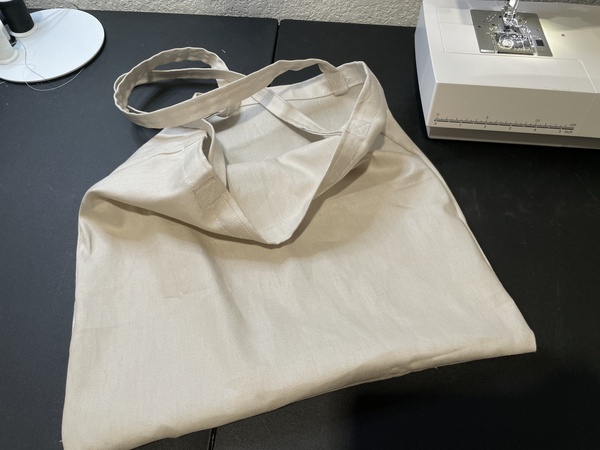
And that’s it. Be proud of your achievement, show it off and share it with your kids.
Extra credit:
You can add some depth to the bag here by practicing adding box corners to the bottom of the tote bag.
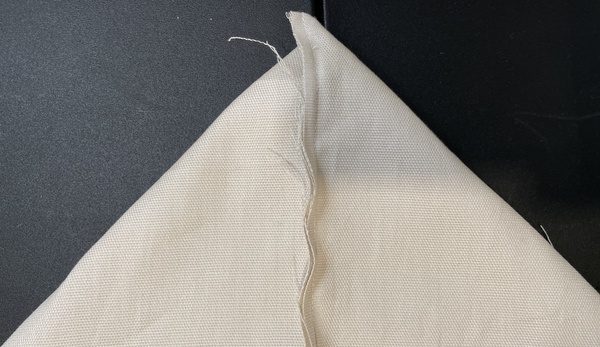
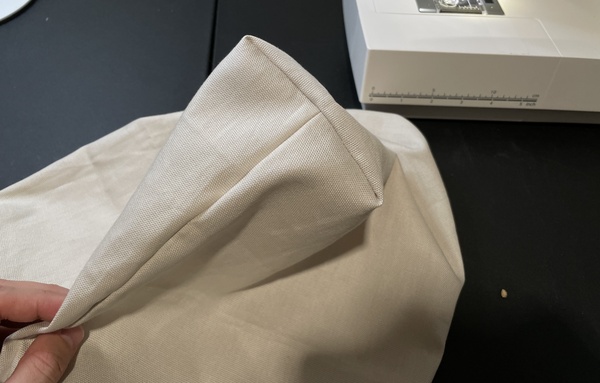
Fold the bag inside out. If necessary, iron again and make sure your center crease is nice and clear. Fold the bottom corner flat so it’s shaped like a triangle.

There should be equal distance from each corner to the center line. Measure 1-2” down the center from the tip and mark.

The further down you go the wider the bag will be. But don’t go too far or the bottom will taper inward toward the bottom.

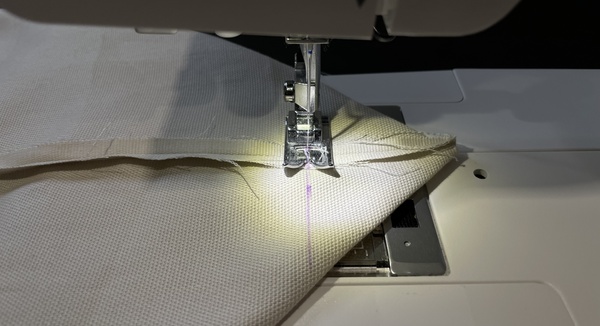
Draw a line across the crease at that point that is perpendicular to the center line. Sew down this line.
Remember to lock your stitch at both ends. Then cut off the triangle part and turn the bag right side out.
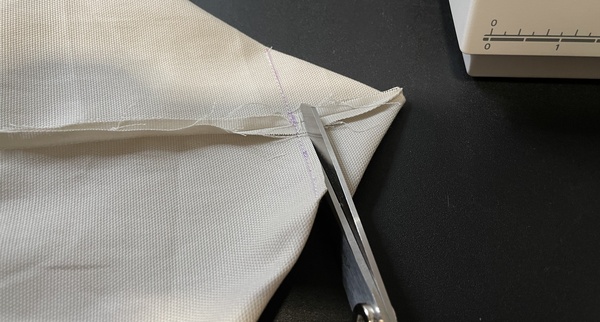
You now have some added depth to the bag.
What to make next
The biggest benefit I’ve found with this is a dad are the ability to spin up bags that you can stash wherever you want. 1) Make a couple so you always have canvas bags in your car for the grocery store (how many times have you bought more than you expected only to have too much to carry in your hands back to your car?). 2) Have a canvas bag available for your kid’s park toys. If you get a ton of sand in it it’s okay because it’s your park toy bag. I’m sure there are lots of things you can benefit by having a random canvas bag for.
Leave a Reply