

Quickly sew up this reusable menu sleeve to help your toddler feel grown up when eating and save all those play menus from getting marked up
Rev. Molly Baskette and Ellen O’Donnell, PhD in their book Bless This Mess talk about Self Determination Theory and the role of autonomy in developing intrinsic motivation when raising kids. We’ve tried in raising our kids to foster that sense of autonomy whenever we can. A big part of that is giving our daughter opportunities to simulate “grown up” experiences like ordering at a restaurant. And I try to create opportunities to sew things, like restaurant-style menus to give them options at breakfast or dinner get my kids involved in meal planning. That’s why I came up with the idea to sew a reusable menu sleeve that we can use at meal time.
Menu Sleeve Backstory: The Ice Cream Playset Menu
For Christmas my brother got my daughter a play ice cream set for her birthday. It’s one of those Melissa and Doug, Montessori style wooden play sets with interchangeable ice cream and popsicles with a pretend counter. It’s actually really fun. We want to encourage creative and independent play with her and I’m glad she is really into it.
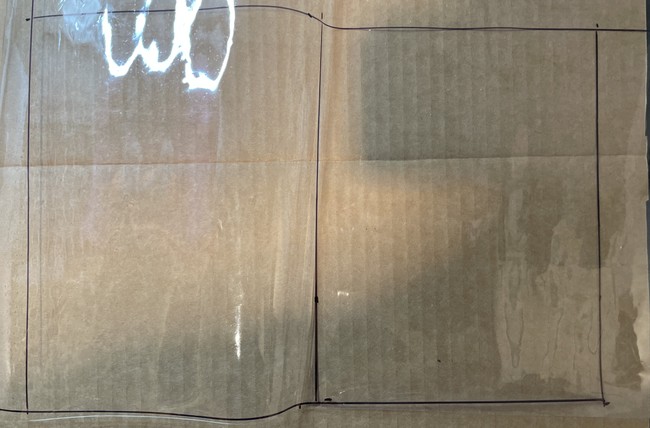
My only hesitation is that it came with a pretend menu with checkboxes next to each of the ice creams so that she can pretend to order things from the menu, like at a sushi restaurant. It’s a sturdy cardboard but is in no way reusable. If she marks on it, then that’s it. So I want something where you can mark on it multiple times or write things on it. Like mark the check boxes with different choices on different days.
My Options for Menu Protection
So one option I have is to laminate it. That way she can use a dry erase marker to make her choices and I can wash it easily. But my other thought was “I can also make other menus of my own that she can use for other situations.” I try to be more frugal with my kids and am very mindful about teaching reusability. So I decided to sew a reusable menu sleeve using vinyl and bias.
Level: Beginner
You will need:
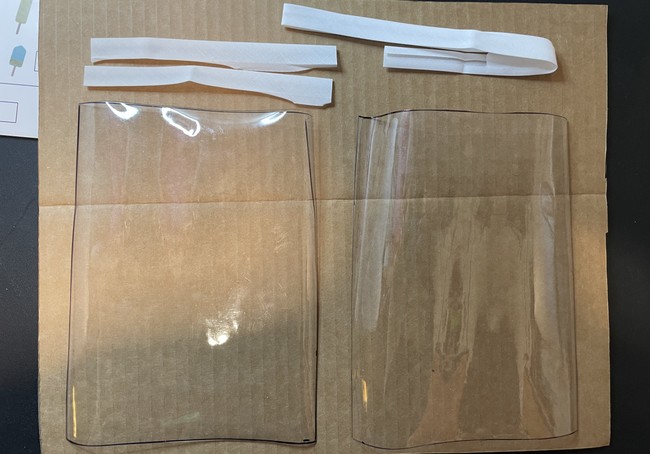
- Clear plastic vinyl
- White bias tape (1/2”)
- Machine, needle, thread
How to sew the reusable menu sleeve:
Sewing the reusable menu sleeve is pretty straightforward. The hardest part is sewing the bias on. But like always, take it slow piece by piece and you can do this.
**Do not make this if you or your child has a vinyl allergy.**
Prepare the Materials

- Measure and cut out the vinyl. You will cut 2 rectangles that will be about 1/2” wider than the sheets you will put in it. So if using a standard letter size sheet of paper it will be 9” x 12 (8+1 x 11+1).
This one is 6 1/2” x 8 1/4” (24” bias all around. This does not have to be exact since you can trim the excess and it will be tucked inside the folder when you sew it).
2. Cut out your bias.
You will need one strip that is equal to two times the side length plus the bottom length plus about 5” of slack. If you are using standard letter size paper the length will be 35.5″ (11 x 2 + 8.5 + 5).
After that cut out two strips that are the length of the top edge plus about 1” for slack (8” for my case). 9.5″ for standard letter size.
If you want a more thorough overview of sewing with bias, I recommend the Kids Bath Towel tutorial.
Sewing together the reusable menu case
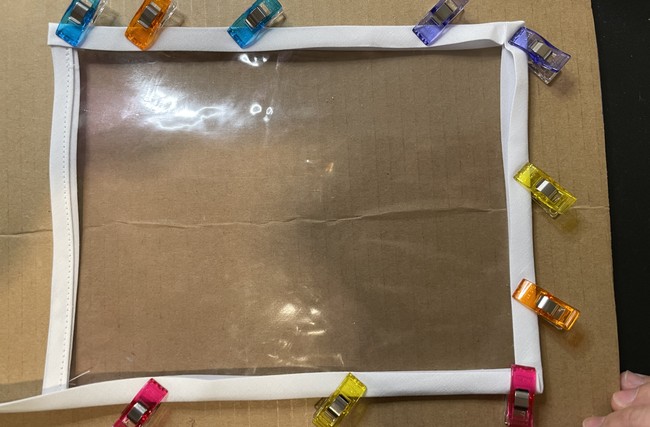
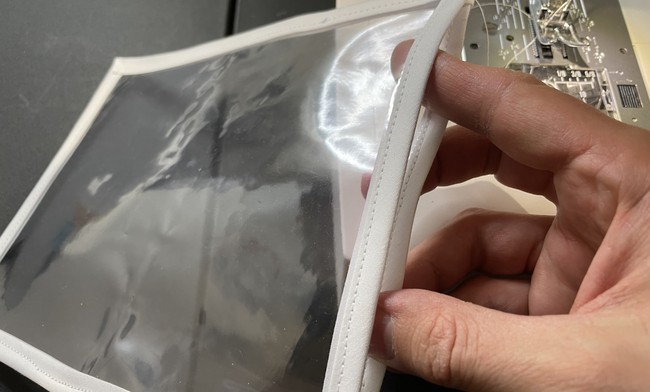
3. Start by sewing the bias to the tops of the two pieces. You will sew a bias strip down to the top of each piece.

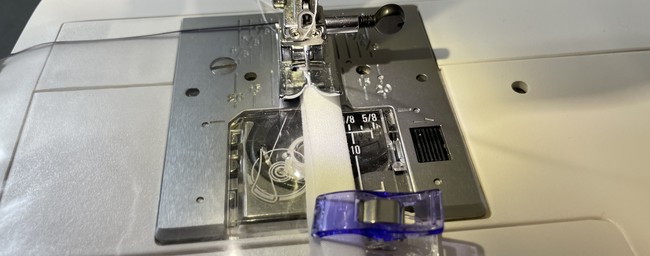
Unfold the bias and line up the raw edge with the edge of the vinyl.
If there is excess on the ends, fold in the ends.
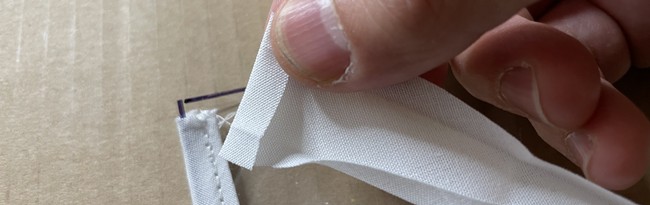
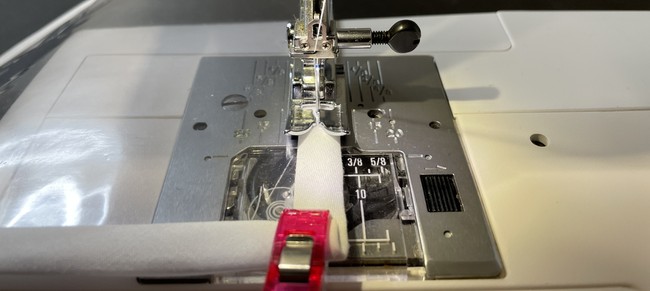
Stitch down with about a 1/8” seam allowance (sew it just under the smaller inside fold). You can see the fold in the photo below, and can see the needle is just to the right of it.

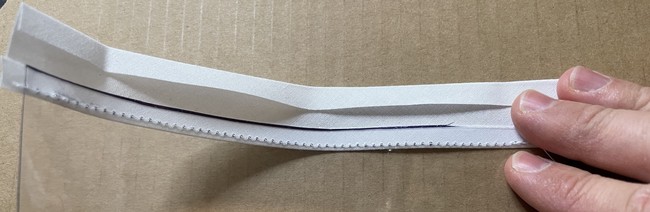
Then fold the bias back and then wrap the bias back over the top of the vinyl to the opposite side. Clip down (don’t use pins here since they punch holes in the vinyl) and sew down.

Repeat this process for the top of the other piece.
Combining the sleeve
4. Next place the layers together and repeat the bias process for the sides and bottom and secure the two vinyl layers into one.
Be sure to fold the ends at the top on each side down.
Tip: You may need to manually move the needle using the wheel to get through all the layers. Otherwise you run the risk of breaking your needle if you try it too fast.
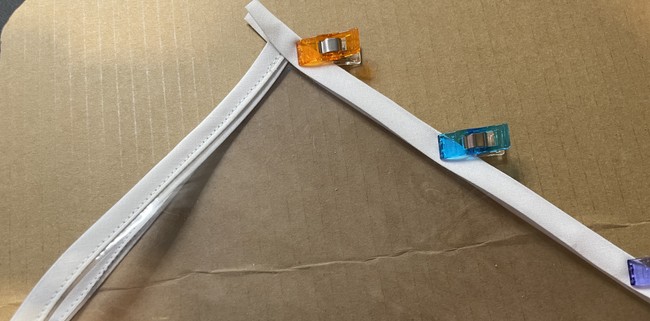
For this part I just do the quick and dirty method: place the middle fold of the bias tape directly on the edge and clip down. Then, making sure the outside edges are folded in, sew directly on. This method skips the line up, sew, fold over, sew method detailed above.
The downside of the quick and dirty bias sewing method is of course that you run the risk of sewing outside the edge of the bias on the opposite side since you can’t see it.

So that being said, just take it nice and slow and be mindful of where the edge of the bias is on both sides while you’re sewing. When you get to the corner, leave the needle down, lift up the foot and pivot around. Try to use your finger and keep the bias pressed up against the edge of the vinyl while you sew.
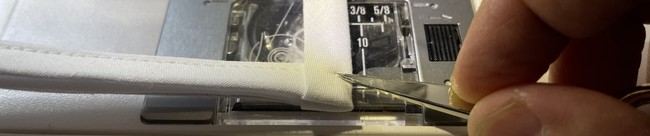
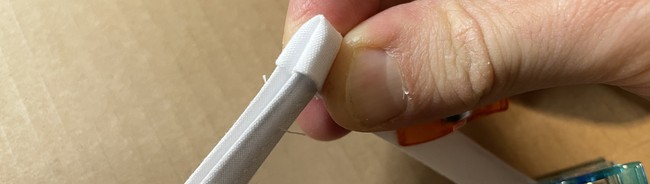
When you get to the other end, fold in the edge inside the two panels and sew it down. Don’t forget to lock your stitch here.
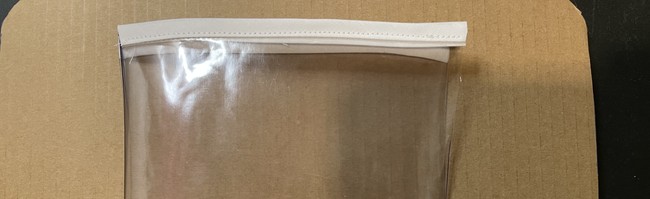
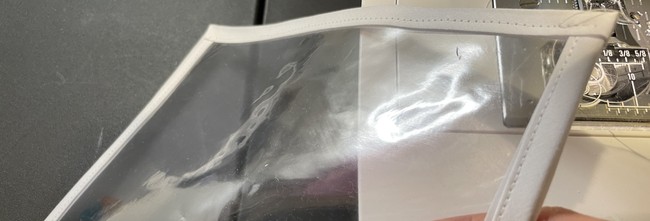
And that’s basically all you need to do to sew the vinyl menu holder. You can use this process to sew different menu or printable holders. This helps with reusability and sustainability by not worrying about your kids marking up these cardboard insert add-ons (unless they pull it out, which for toddlers is bound to happen).
What to make next
And you can make different menus to help your kids feel grown up by letting them make their own choices for meals (giving a sense of control but also providing healthy options within reason).

Leave a Reply