

This bookmark pencil pouch is a great beginner sewing project to sew for a significant other who is into reading or journaling.
My wife originally saw this elastic fabric pencil pouch via an influencer on Instagram. It was a neat design. It is basically a narrow pouch with a piece of elastic around it that can be used to wrap around a book as, obviously, a pencil holder or a makeshift bookmark. Following some backtrack links I found that I could buy a ready-made one from a major big-box retailer for about $8.
“Can you make this?”
She asked me. So using my frugal sensibilities I reckoned that I could just make one myself using scrap fabric, extra elastic and a $0.99 cent 9” zipper from Hobby Lobby. That’s a savings of about $7. Not too shabby.
Why make your own elastic fabric pencil pouch ?
Now, provided this is not the same as making a lookalike designer handbag yourself. But it does allow you to make something yourself that isn’t outsourced somewhere or made under questionable labor practices. You can also personalize it with your own designs. And for the equivalent price of one bought from the store, you can make about six more to give to friends or relatives. That seems like a pretty frugal, yet unique, stocking stuffer.
It only involves sewing two pieces of fabric, a zipper and an elastic strap. I was actually to sew this one in about an hour.
Materials You Will Need to Sew the Elastic Fabric Pencil Pouch
Most importantly you will need a sturdy cotton fabric like cotton canvas or Kona quilt cotton. You can use regular cotton but I would recommend reinforcing it with a lightweight stabilizer. It is a small item, so you really don’t need that much, which makes this project also a good stash-buster if you have leftover remnants at home.
1/2” Elastic
(1) 9” All purpose zipper
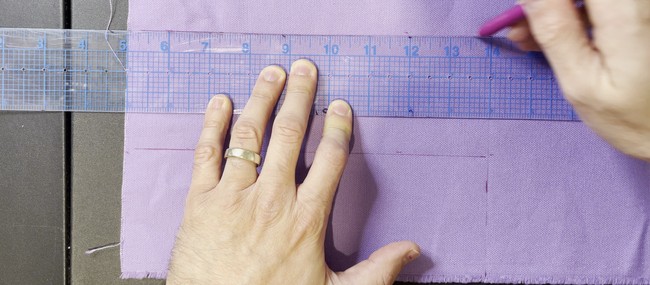
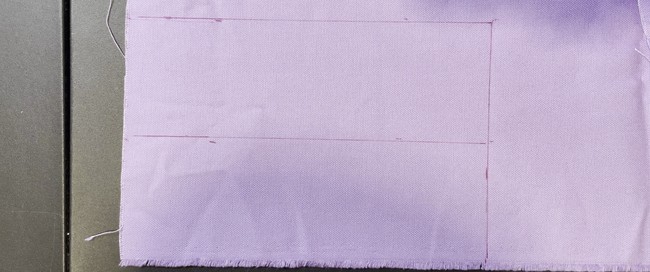
Measure out your Pieces:
- Elastic strap: 10” (1 piece) ( you will be tucking it in 1/2” under on each side)
- Pouch body: 3” W x 9” H (2 pieces)
Finished dimensions: 8” x 2.5”
It’s worth noting that this pouch does not have a lining. For the sake of simplicity I just went with one layer of fabric. To keep the threads from the seams on the inside from getting snagged on the zipper I would recommend going over the seams with pinking sheers.
Making the elastic fabric pencil pouch

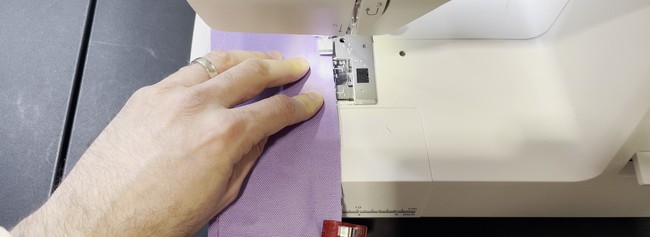
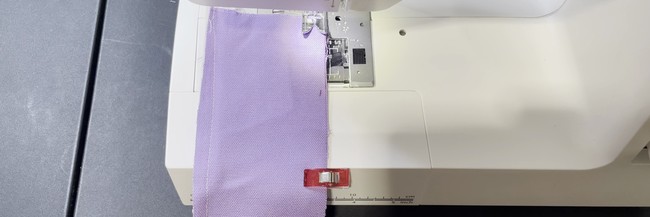
1. Sew the body pieces to the zipper. Line up the raw edge of the right side of the zipper with the raw edge of the right side of the first fabric piece with right sides facing (RSF). Sew this down.
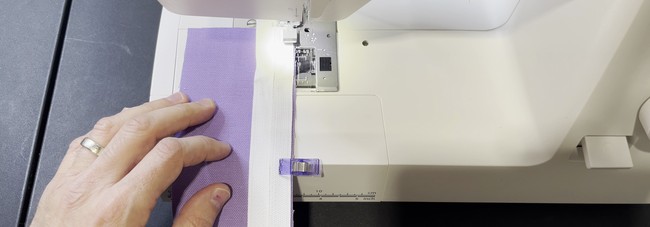
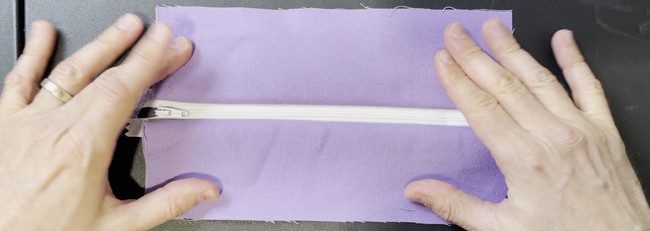
2. Do the same with the other side of the zipper and the other body panel piece.
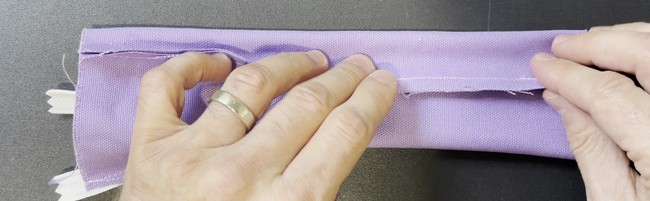
When you fold out the pieces it should look like this.
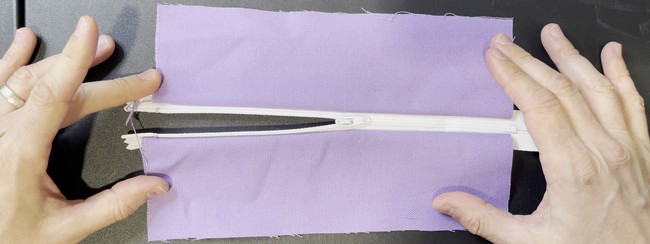
3. Pull the zipper down halfway. This will allow you to flip the pouch right side out at the end.
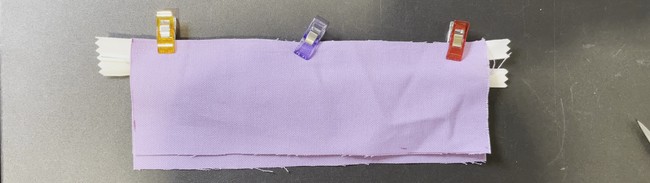
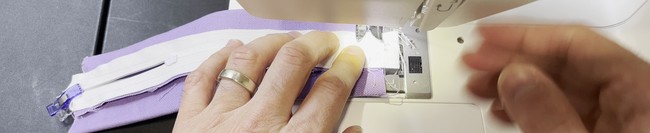
4. Next sew two body pieces together. Pin/clip the raw edges of the long ends of the body pieces together right sides facing (RSF).
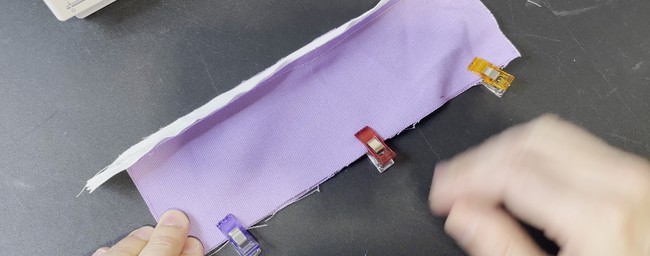
Sew together with a 1/4” seam allowance.
Iron down the seam allowance

Preparing the Elastic Strap
5. Insert the elastic band inside the pouch and feed in either end on the inside. Feed it about 1/2” outside the pouch.

A Necessary Detail When Sewing the elastic fabric pencil pouch
The important thing to remember when sewing this elastic fabric pencil pouch is that the elastic goes on the inside of the pouch when you are sewing. It will be on the outside when you flip it back out, so keep it on the inside when you are making it. Otherwise if it’s on the outside when you sew, when you turn it out the elastic will end up on the inside.
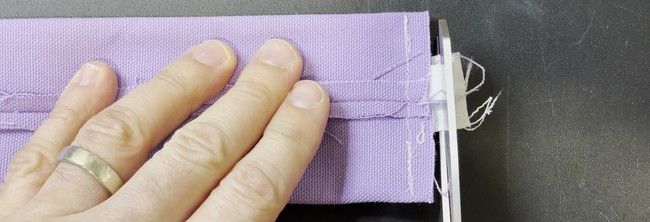
6. Now sew up both ends with a 1/4” seam allowance.
Stitch down the other side.

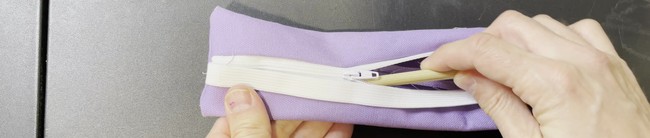
7. Trim the ends off the zipper.
8. Flip the pouch right side out through the zipper. Remember how we kept the zipper down. Poke out the corners with a chopstick or pencil.

9. Poke out the corners with a chopstick or pencil
A note about fabric turning tools
Once I started sewing, one of the things that would often bug me is poking out the corners of fabric once I’ve turned it right side out. I’m a stickler, so I always try to poke it out into as clean a corner as possible. There are professional tools like point turners that you can use to poke out corners and flatten edges for turning. These look like a small, pointy butter knife.
But one tricky thing about these is if you push too hard into the corner, depending on the fabric like cotton, it’s easy to accidentally poke a hole. So it may sound funny, but what I’ve found, and many people have found as well, is that one of your most reliable sewing tools for this work is a wooden chopstick. The chopstick is long and sturdy, and just rounded (but not too pointy) to help make short work of turning fabric. I even bought a pack of stuffing once that came with a “special tool” that was basically a disposable wooden chopstick. So the next time you’re getting take-out, grab an extra pair of chopsticks and keep it in your sewing inventory forever. You won’t be let down.
10. Iron down and that’s about it. This thing on the surface looks complicated, but it’s actually super easy to sew. I sewed this one in about an hour.
You could even sew your own elastic fabric pencil pouches as a set and distribute them to your book club. Really the sky’s the limit here. These are an easy project to make as stocking stuffers or general thank you gifts.
Leave a Reply